
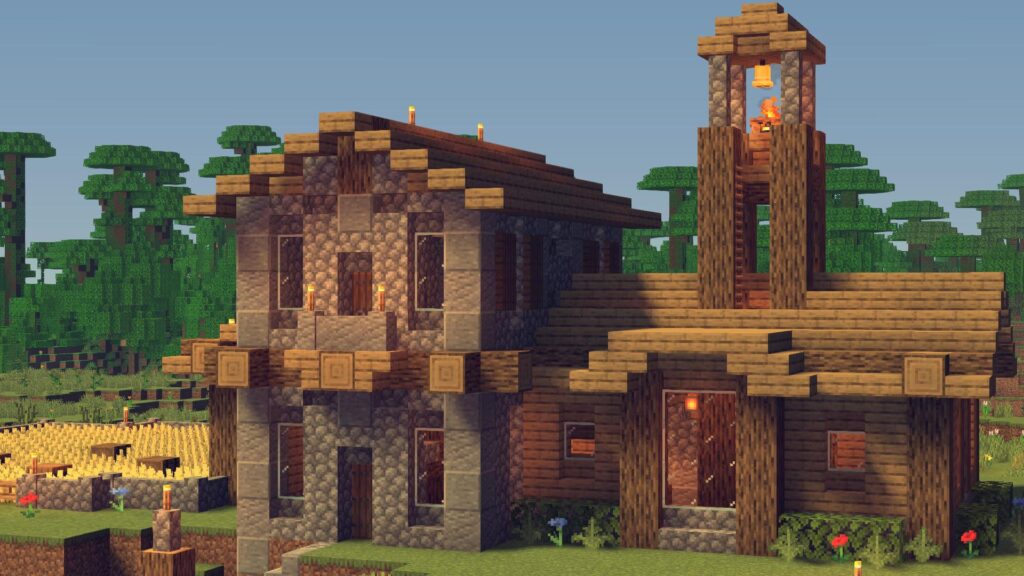
Surviving in Minecraft is a test of resourcefulness, strategic planning, and architectural creativity. From the moment a player spawns into a newly generated world, the clock begins ticking. With only a brief window of daylight to secure essential resources, the transition from empty-handed vulnerability to thriving inside a fortified base requires immediate action and long-term foresight.
Understanding the mechanics of the game, from biome selection and resource management to mob spawning conditions and agricultural sustainability, is crucial for anyone looking to master survival mode. This comprehensive guide breaks down the essential phases of establishing a foothold in a new world, gathering necessary materials, and engineering a permanent base that offers both safety and efficiency.
Phase 1: The Crucial First 24 Minutes
Every new Minecraft world drops players into an unknown environment with absolutely nothing in their inventory. A standard day-night cycle lasts exactly 20 real-world minutes, with daytime occupying the first 10 minutes. This provides a very narrow window to prepare for the hostile creatures that spawn when the sun sets.
Immediate Resource Gathering
The absolute first priority is acquiring wood. Trees are abundant in most biomes, and punching wood logs is the foundational action of the game. Once several logs are collected, they must be converted into wooden planks through the inventory crafting interface. These planks are then used to create a Crafting Table, the core utility block required to unlock the majority of the game’s recipes.
With a Crafting Table placed on the ground, players can combine planks and sticks to craft a Wooden Pickaxe. This tool is rarely used for long; its sole purpose is to mine a few blocks of stone. Upgrading immediately to stone tools—specifically a pickaxe, sword, and axe—dramatically increases mining speed and defensive capabilities. For a complete breakdown of essential tool recipes, consulting comprehensive crafting guides available on IGN ensures no time is wasted fumbling with block placements.
Securing Food and Temporary Shelter
As the day progresses, the player’s hunger bar will begin to deplete. Sprinting and taking damage accelerate this process. Securing a food source is mandatory. Harvesting nearby animals like pigs, cows, or sheep yields raw meat, though it is highly recommended to cook this meat later for maximum hunger restoration. Alternatively, breaking oak leaves occasionally drops apples, providing a quick, vegetarian food source.
As the sun begins to dip below the horizon, establishing a temporary shelter becomes a matter of life and death. During the first night, aesthetics do not matter. The goal is strictly defensive. Digging a small cave into the side of a hill or constructing a simple three-by-three dirt hut is sufficient. If sheep were harvested earlier, three blocks of wool and three wooden planks can be crafted into a bed, allowing players to sleep through the night and bypass the dangers of nocturnal mob spawns altogether.
Phase 2: Upgrading Technology and Subterranean Exploration
Once the initial panic of the first night has passed, the objective shifts toward upgrading equipment and securing a reliable source of fuel and durable materials. This requires delving underground.
The Importance of Coal and Iron
Mining is the engine that drives progression. Players must excavate a staircase downward, searching for two immediate resources: coal and iron. Coal is easily identifiable by the black flecks in stone and is essential for crafting torches and fueling furnaces. Without torches, underground exploration is impossible, as low light levels allow hostile mobs like Zombies, Creepers, and Skeletons to spawn.
Iron ore, distinguished by its tan-colored streaks, is the next major milestone. Once mined, raw iron must be smelted in a furnace (crafted from eight cobblestone blocks). Iron ingots unlock a new tier of tools that are vastly superior to their stone counterparts in durability and speed. More importantly, iron is required to craft a shield, an indispensable defensive item that can block incoming arrows and negate Creeper explosion damage. To optimize excavation strategies and locate specific ores efficiently, players often reference GameSpot’s mining techniques and strategies, which detail the ideal depth levels for various resources.
Phase 3: Scouting the Ideal Location for a Permanent Base
A dirt hut is functional for the first few days, but long-term survival demands a structured, permanent base. Selecting the right geographical location is perhaps the most impactful decision a player will make.
Analyzing Biome Advantages
Different biomes offer distinct advantages and challenges.
- Plains: Excellent for beginners. The flat terrain minimizes the need for terraforming, and visibility is high, making it easy to spot approaching mobs. Plains are also prime locations for passive mob spawns, such as horses and cows.
- Forests: Abundant in wood, which is crucial for early game building. However, the dense foliage can obscure vision and create shaded areas where hostile mobs can survive during the day.
- Mountains (Extreme Hills): Offer natural defensive elevations and easy access to exposed coal and iron. Building a fortress on a cliff is aesthetically pleasing but requires extensive scaffolding and carries the risk of fatal fall damage.
Understanding the environmental impacts of these regions is critical. Reviewing detailed biome analyses from Polygon can help players identify the specific resources tied to each unique landscape.
Strategic Proximity
Regardless of the biome, a permanent base should ideally be situated near key geographic features. Proximity to an ocean or a river provides an endless water source for farming and easy transportation via boats. Establishing a base near a naturally generated Village offers massive advantages; players can trade cultivated resources for rare items, armor, and enchanted books.
Designing Functional Spaces: Base Building Comparisons
When transitioning from a temporary hideout to a permanent structure, the architectural priorities shift from mere survival to efficiency, storage, and defense.
Structural Comparison: Temporary vs. Permanent Shelters
| Feature | Temporary Shelter | Permanent Base |
| Primary Material | Dirt, Cobblestone, Raw Wood | Stone Bricks, Processed Planks, Glass |
| Space | 3×3 or 4×4 blocks | Multi-room, multi-level structures |
| Lighting | Bare minimum torches | Extensive internal and external lighting |
| Storage Capacity | 1-2 small chests | Dedicated storage room with categorized double-chests |
| Food Supply | Foraged apples, raw meat | Automated crop farms, dedicated animal pens |
| Security | Dirt block blocking the entrance | Wooden or Iron doors, perimeter walls, defensive fencing |
Phase 4: Constructing the Permanent Base
Building a base requires more than simply stacking blocks. A well-designed base streamlines the survival experience, ensuring that crafting, smelting, and resting can be done rapidly and safely. For inspiration on structural designs, many players look to expert base building strategies shared by PC Gamer, which highlight the importance of modular base layouts.
Essential Rooms and Layouts
- The Storage Center: As players explore, their inventory will quickly overflow. A dedicated storage room filled with double chests is necessary. Organizing these chests by category (e.g., natural blocks, ores, mob drops, food) saves countless hours of searching. Using item frames or signs on the outside of chests provides clear visual labels.
- The Forge (Smelting and Crafting): This area should house multiple furnaces, a crafting table, a stonecutter, and an anvil. Placing these utilities in close proximity to the storage room ensures that players can quickly grab raw materials, process them, and store the finished products without running back and forth.
- The Safe Room (Bedroom): The bed is the most important item in the base, as it resets the player’s spawn point. If a player dies, they will respawn at their bed. This room must be fully enclosed and well-lit to ensure a safe respawn environment.
Defensive Architecture and Lighting Mechanics
A beautiful base is useless if it is overrun by creepers. Minecraft operates on a specific lighting engine where hostile mobs only spawn in complete darkness (Light Level 0). Therefore, the interior of the base and the immediate exterior perimeter must be thoroughly illuminated. Torches, lanterns, or glowstone should be placed strategically to overlap light radii. Understanding these specific algorithms is easier when referencing the Minecraft Wiki’s breakdown of mob spawning mechanics.
Furthermore, physical barriers are essential. A perimeter wall made of stone or sturdy wood, standing at least two blocks high, prevents spiders from easily climbing over and completely stops zombies and skeletons from entering the compound.
Phase 5: Establishing Long-Term Sustainability
With the walls built and the chests organized, the final phase of establishing a permanent base is securing an infinite, renewable supply of food and materials. Relying on hunting wild animals is unsustainable in the long run.
Agricultural Infrastructure
Creating a farm is relatively simple but requires specific spatial planning. A single block of water will hydrate farmland up to four blocks away in all directions, creating a 9×9 square of hydrated soil. Using a hoe to till the dirt, players can plant seeds gathered from wild grass to grow wheat. Wheat is a foundational crop used to bake bread and, more importantly, to breed cows and sheep.
Building fenced pens for livestock guarantees a constant supply of leather (for books and armor), wool (for beds and decorations), and high-quality food (beef and mutton). To maximize yields and understand crop growth rates, players rely heavily on GamesRadar’s insights on Minecraft farming.
Introduction to Automated Systems
As players grow more comfortable with the mechanics of survival, the base can be upgraded with basic automation. Redstone, a mineral found deep underground, acts as the electrical wiring of the Minecraft universe. With Redstone dust, pistons, and observers, players can create semi-automated farms that harvest crops at the push of a button, or automated sorting systems that deposit items into their correct chests. Those looking to implement these complex circuits often start with a solid introduction to Redstone engineering to grasp the logic gates and power systems involved.
Frequently Asked Questions (FAQ)
What is the best food to rely on in the early game?
Baked potatoes and cooked beef (steak) are widely considered the best standard food sources. They replenish a high amount of hunger points and provide excellent “saturation,” which dictates how long a player remains full before the hunger bar begins to deplete again.
Why are hostile mobs spawning inside my house?
Mob spawning is tied directly to light levels. If a hostile mob spawns inside a base, it means there is a block somewhere with a light level of 0. Ensure corners, large open rooms, and rooftops are adequately lit with torches or lanterns.
Should I build my base out of wood or stone?
While wood is highly accessible in the early game, it is highly flammable. A lightning strike or a misplaced block of lava can destroy hours of work. Stone, cobblestone, or stone bricks are highly recommended for permanent structures due to their blast resistance against Creepers and complete immunity to fire.
How deep should I dig to find diamonds?
Following recent terrain generation updates from Minecraft’s official documentation, diamonds are most commonly found deep underground, generally between Y-level -50 and -64. Digging near bedrock yields the highest concentration of diamond ore, though players must remain vigilant for lava pools.
Forging a Masterpiece in the Overworld
Transitioning from a vulnerable spawn state to the master of a fortified, sustainable base is the core loop of the survival experience. It requires balancing immediate tactical needs—like throwing down a crafting table before dusk—with long-term strategic goals, such as engineering a massive agricultural wing.
By prioritizing resource gathering, understanding the environmental mechanics of biomes, and executing a calculated architectural plan, the hostile world of the game shifts from a terrifying landscape into an open canvas. A permanent base is never truly “finished.” It evolves alongside the player, expanding from a humble stone sanctuary into a sprawling complex equipped with automated redstone farms, enchanted libraries, and portals to other dimensions. The key is establishing that strong, secure foundation, allowing for boundless exploration and creativity in the days and weeks that follow.